How to set up Quasar Science lights with Assimilate live fx
Written by Alex Pearce, Senior Creative Technologist
In this tutorial video, I'll show you how to set up your Quasar Science fixtures with ASSIMILATE Live FX to achieve image-based lighting (through pixel mapping). Once it's set up, it's very easy to sample any area of your canvas and to control the brightness/intensity for each array.
Watch now for a step-by-step guide with all the information you need to program your lights on the fixture and in the software.
Quasar Science Fixture Settings
You'll want to make sure you use the following settings on your Quasar Science fixtures:
- Number of Pixels - Max (48 for 8' Rainbow, 20 for 2' Double Rainbow, etc.)
- Profile - 64
- Wired Mode - sACN
- DMX Channel - 1
- Multicast - Enabled
- Universe - Set your array appropriately. For example, if you have an array of 47, make the top fixture universe 1, the second fixture 2, all the way through your last fixture, universe 47
- Wireless Mode - Off
- Lead/Follow - Off
Make sure you set your Profile to 64, sACN is on, your pixel count is the highest and that you know which universe is the start universe.

Live FX Settings
There are a few things to get setup in Live FX. Let's start with Protocols, sACN.
- Make sure Output is turned on, and the correct Ethernet adapter where the Light or network switch is plugged in.
- You may need to restart Live FX if you don't see your adapter and it was plugged in after you started Live FX.
- Make sure your start and end universe covers your range.


Now under the Fixture Tab, let's set add a new fixture and use the following settings:
- Universe - 1 (or whatever your starting universe is)
- Channel - 1
- Channels - 12
- Globals - 6
- Repeat in Universe - 48* (This is the number of pixels in your lighting fixture)
- Repeat the Universe - 47* (This is the number of fixtures in your arrary)
Channel assignments in Live FX
- 1. Sample: Red
- 2. Fine
- 3. Sample: Green
- 4. Fine
- 5. Sample: Blue
- 6. Fine
Global Channels (Make sure to write a description)
- 7G - CCT (147 is 6500)
- 8G - +/- Green (0 is none)
- 9G - Spectrum (255 is full spectrum)
- 10G - Color Space (0 is rec 709)
- 11G - Output
- 12G - Reserved

Don't forget to change the Sample Grid to Distribute and put as many segments as you have fixtures in your array!

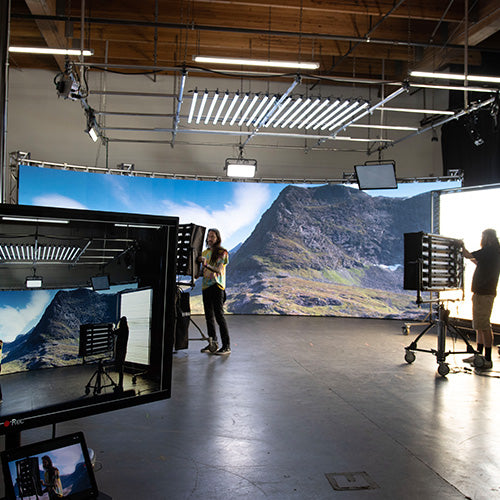
Notice the area we are sampling is being pixel mapped correctly to the array of 47 Rainbow 2 fixtures.

Once you've set up your fixture, you can duplicate this fixture (see top left of photo below) or you can export your entire setup using the export button (see bottom left of picture below).
I use the export feature to save my entire stage layout, over 150 fixtures! And that's it. It may seem like a lot, but once you've set it up once, it's very easy to share your setup with yourself or with others.